When a faucet is leaking from the handle instead of the spout this usually means something inside the faucet is worn, cracked, or loose; like a damaged O-ring, a faulty cartridge, or a loose packing nut. Unlike a typical spout drip, a leak from the handle often shows up as water pooling at the base or dripping when the faucet is turned on or off.
This kind of leak can waste water, lead to hidden cabinet damage, and get worse if left alone. The good news? It’s often a simple fix you can handle at home with the right steps and tools.
I’ll walk you through what’s causing the leak, how to check it step by step, how to fix it yourself, and when it’s better to call a plumber
Let’s break it down so you fix it right the first time; no guesswork, no wasted effort.
Handle Leak vs. Spout Leak: What’s the Difference?
A faucet leaking from the handle instead of the spout usually means an internal part like an O-ring, cartridge, or packing nut has failed. Spout leaks drip from the end of the faucet; handle leaks seep from where you turn the tap.
That small difference matters because the repair approach is completely different.
How Water Flows Inside a Faucet
Water flows through supply lines into the valve body, similar to how it operates in a metering cycle faucet which controls timing and flow automatically. The handle regulates flow using a cartridge, washer, or ball system, while the spout simply delivers it.
When internal parts wear out, water escapes near the handle—never reaching the spout.
Spout Leaks vs. Handle Leaks: What Causes Each?
| Leak Location | Likely Cause | Fix |
| Spout Drip | Worn washer or valve seat | Replace washer or valve seal |
| Handle Drip | Damaged cartridge or O-ring | Replace cartridge or O-ring |
Spout leaks are more common in older compression faucets and are sometimes mistaken for aerator clogs that also cause water flow issues. Handle leaks typically occur in modern cartridge-style designs where seals degrade over time.
Why Spotting the Difference Matters
- Replacing the wrong part wastes time and effort
- Handle leaks can damage cabinets or counters
- Spout drips fall into the sink handle leaks often spread under the base
If you see water near or under the handle, even when the faucet is off, you’re dealing with a handle-side leak—not a spout issue.
Main Reasons Why Your Faucet Leaks from the Handle
A faucet that leaks from the handle instead of the spout is often caused by worn O-rings, a cracked cartridge, loose internal nuts, mineral buildup, or excessive water pressure. These internal problems let water escape before it reaches the spout, usually dripping around the base or behind the handle.
If your faucet handle is leaking, here’s how to match the symptoms to the root cause so you can fix it properly.
1. Worn-Out O-Ring or Seal
The O-ring is a small rubber ring that forms a watertight seal between the faucet body and handle. It prevents water from seeping out during operation.
What to look for:
- Water puddling at the base of the handle
- Handle feels loose or wobbly
- Leak only happens when faucet is turned on
Over time, the O-ring can crack, flatten, or shift out of position, especially in high-use faucets. When it fails, water escapes around the handle instead of flowing cleanly to the spout.
Replacing the O-ring with a new, properly sized one is a fast, low-cost fix.
2. Cracked or Corroded Cartridge or Valve Stem
Most single-handle faucets use a cartridge to control both temperature and flow. If this cartridge is cracked, worn, or corroded, water can leak through internal gaps and exit from the handle area.
Symptoms:
- Water drips from the handle whether faucet is on or off
- Inconsistent water temperature or flow
- Difficulty turning the handle smoothly
A faulty cartridge is one of the most common reasons for handle leaks in newer faucets. Replacing it usually restores full seal integrity and stops the leak.
3. Loose Packing Nut or Bonnet Nut
Just beneath the handle sits a packing nut (or bonnet nut), which secures the internal components. If this nut comes loose, water can leak through the gaps around the valve stem.
How to check:
- Remove the handle cap and tighten the nut with a wrench
- Look for moisture or rust buildup under the handle
- Leak stops temporarily when pressure is adjusted
Tightening this nut may stop the leak. If the seal is degraded, you might need to replace the packing material or washer as well.
4. Mineral Buildup or Debris
If you live in a hard water condition area, minerals like calcium and lime can build up around internal faucet parts. These deposits corrode seals and create tiny gaps that let water escape near the handle.
What you’ll notice:
- White or green crust around the faucet base
- Stiff or jerky handle movement
- Leak worsens over time
Cleaning internal parts with vinegar or a commercial descaler can remove deposits. If corrosion has damaged the cartridge or O-rings, they’ll need to be replaced.
5. High Water Pressure
When household water pressure is too high (above 60 PSI), it puts stress on the internal components of the faucet. This can cause leaks around the handle, even if seals and cartridges are in good condition.
How to test it:
- Use a pressure gauge at an outdoor spigot
- Look for leaks during peak water usage times (e.g., evenings)
- Notice handle leaks with new faucets or after plumbing changes
If pressure is too high, a pressure-reducing valve (PRV) may be needed to protect your plumbing system—and your faucet—from internal stress. According to the Environmental Protection Agency (EPA), homes should keep water pressure below 60 PSI to prevent leaks and extend fixture lifespan.
How to Identify the Exact Cause of the Leak
A faucet leaking from the handle is usually caused by internal wear, like a cracked cartridge, worn O-ring, or loose packing nut. Identifying the exact issue takes just a few minutes with a simple inspection under the handle.
Here’s how to check what’s wrong before jumping into repairs.
Visual Inspection Steps
- Shut off both hot and cold water supply valves under the sink.
- Remove the faucet handle cap using a flathead screwdriver.
- Look inside the handle assembly for:
- Cracks or corrosion on the cartridge or stem
- Flattened, dried, or missing rubber seals
- White mineral buildup or green corrosion
- A packing nut that’s loose or rusted
- Identify the faucet type so you know what parts to buy:
- Compression: Two separate handles
- Cartridge: Single-handle with replaceable cartridge
- Ball: Round handle and dome cap
- Ceramic disc: Smooth turn handle with disc cartridge
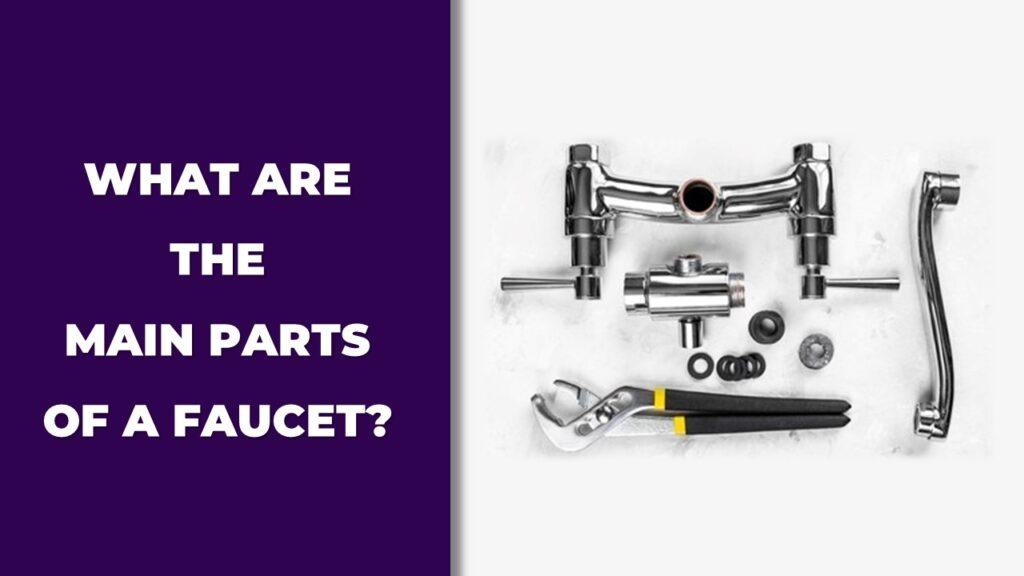
Tools You’ll Need
- Allen wrench (for handle set screws)
- Adjustable wrench
- Flathead and Phillips screwdrivers
- Plumber’s grease
- Replacement parts (O-rings, washers, or cartridge matching your faucet type)
How to Fix a Faucet Leaking from the Handle (Step-by-Step)
Fixing a leaking faucet handle means removing the handle, identifying worn parts, and replacing them with compatible pieces. The steps vary slightly based on your faucet type.
1: For Compression Faucets
- Remove the faucet handle and packing nut.
- Pull out the valve stem and inspect the washer at its end.
- If it’s worn or cracked, replace it with an identical size.
- Check and replace the packing material if degraded.
- Tighten the packing nut securely; just enough to stop movement without overtightening.
2: For Cartridge Faucets
- Pop off the handle cap and remove the retaining screw or clip.
- Pull the old cartridge straight out. Use pliers if needed.
- Take the old cartridge to a hardware store to get an exact match.
- Install the new cartridge in the same orientation.
- Reassemble the handle and turn water back on to test.
3: For Ball or Ceramic Disc Faucets
- Ball Faucets
- Disassemble the handle, dome, and cam.
- Remove the ball, springs, and rubber seats.
- Replace worn parts using a repair kit that matches your brand. If you’re unsure about faucet size and fit, see our 4-inch vs. 8-inch faucet comparison to better understand your setup.
- Ceramic Disc Faucets
- Remove the disc cartridge.
- Inspect and clean the housing.
- Replace any damaged seals or the full cartridge if worn.
These faucets may require faucet-specific tools and are usually easier to repair with brand-specific kits.
Common Mistakes to Avoid
- Using a cartridge that doesn’t match your faucet brand
- Over-tightening parts and cracking plastic or metal components
- Skipping plumber’s grease; causes faster wear and stiff operation
- Forgetting to turn off the water supply before starting
- Misidentifying faucet type; leads to wasted time and wrong parts
When Should You Call a Plumber?
If your faucet still leaks after replacing parts or tightening components, it may be time to bring in a professional. Some leaks signal deeper plumbing problems that DIY repairs won’t fix.
Here’s when it’s smarter and safer to call a plumber:
- The leak continues after replacing O-rings or cartridges: Internal damage or misalignment may be more complex than it looks.
- Water is leaking under the sink or behind the wall: This could indicate a supply line or shutoff valve issue, not just a faucet problem.
- The handle is stuck, fused, or heavily corroded: If parts won’t move or crumble during disassembly, forcing them may cause more damage.
- You don’t know what type of faucet you have: Without proper identification, matching parts becomes guesswork.
- You notice a musty smell or soft wood inside the cabinet: Which could also happen when your faucet turns on by itself and leaks overnight. These are signs of hidden water damage or mold, which need professional evaluation.
When a quick fix turns into a hidden hazard, calling a licensed plumber can prevent further water damage, mold issues, or costly structural repairs.
Cost of Fixing a Leaking Faucet Handle
Fixing a leaking faucet handle is often low-cost especially if you’re doing it yourself. But prices vary depending on the problem, faucet type, and whether you hire a plumber.
Here’s a quick comparison of typical repair costs:
Repair Cost Comparison: DIY vs. Plumber
| Repair Type | DIY Cost | Plumber Cost |
| O-ring replacement | $1-$5 | $60-$100 |
| Cartridge replacement | $10-$25 | $100-$150 |
| Packing nut tightening | Free | $50-$80 |
| Full faucet replacement | $40-$150 | $150-$300+ |
Key Notes:
- DIY repairs are typically under $25 and can be done in under an hour.
- Plumber fees include labor, diagnostics, and possible emergency charges.
- Old or rusted faucets may cost more to repair than replace, especially if you’re comparing high-end faucets where full replacement delivers better value.
If your faucet is over 10 years old or has been repaired multiple times, replacing it may offer longer-term reliability and better water efficiency.
How to Prevent Future Faucet Handle Leaks
Faucet handle leaks often return if seals wear out again or internal parts go unchecked. The best way to prevent future leaks is by maintaining clean, lubricated parts and addressing early signs of wear before they turn into drips.
Here are specific, reliable ways to prevent your faucet from leaking again:
- Inspect and clean the handle every 6 to 12 months: Regular inspections help spot worn O-rings, loose nuts, or early corrosion before leaks begin.
- Lubricate O-rings and threads with plumber’s grease: A thin layer of grease on rubber seals and metal threads reduces wear and keeps parts moving smoothly.
- Avoid slamming or overtightening the handle: Forceful use strains cartridges and packing nuts, shortening the lifespan of seals and causing misalignment.
- Install a water softener if you have hard waterHard minerals can clog or corrode internal parts. A water softener reduces buildup and extends faucet life.
- Replace cartridges or washers every 5–7 years: Even if there’s no visible leak, replacing worn internals on schedule helps maintain a tight seal and smooth operation.
- Monitor water pressure regularly: Keep pressure below 60 PSI to reduce internal stress on faucet components. A simple gauge at an outdoor spigot will do the job.
Final Verdict
Handle leaks aren’t like regular spout drips. They’re usually a sign that something inside your faucet has failed; whether it’s an O-ring, cartridge, or packing nut. These parts control how water flows and seals inside the valve. When one breaks down, water escapes from around the handle instead of coming cleanly through the spout.
The good news is most faucet handle leaks are quick to fix. Whether you’re replacing a worn rubber ring, tightening a loose nut, or swapping out a cartridge, the process is straightforward and costs very little. Many repairs can be done with basic tools you already have at home.
If you’ve followed the inspection and repair steps in this guide, you’ve likely already fixed the problem or at least identified the part that needs replacing. If things still aren’t working as expected, or if you see signs of hidden water damage, that’s when it makes sense to call a plumber.
With the right tools and a clear plan, there’s no need to live with a leaking faucet handle. You can fix it today and avoid bigger problems tomorrow.
Related Frequently Asked Questions (FAQs)
Why does my faucet only leak when it’s turned on?
When the faucet is turned on, water pressure builds up inside. If seals near the handle are worn or misaligned, that pressure forces water to escape around the handle instead of flowing cleanly through the spout.
Can I use a faucet that’s leaking from the handle?
Technically yes, but it’s not recommended. A leaking handle can lead to water seeping inside the faucet body or base, causing cabinet damage, mold growth, or long-term corrosion you might not see right away.
Is it safe to DIY a faucet handle repair?
Yes, if you’re comfortable using basic tools and turning off the water supply. Most faucet handle repairs like replacing an O-ring or cartridge can be done in under 30 minutes with step-by-step guidance.
How do I know if the cartridge is the problem?
If the faucet leaks while turned off, or if the handle feels loose, stiff, or grinds during use, the cartridge is likely worn or cracked. Replacing it usually stops the leak and restores smooth function.
Should I replace the faucet if it’s old and leaking?
If your faucet is more than 10 years old, showing signs of corrosion, or has needed multiple part replacements, full replacement is often the better long-term fix. Newer models are also more water-efficient.

Dylan Foster is a family man with years of hands-on experience in plumbing, household maintenance, and fixing everyday issues around the home. A former plumber, Dylan knows what it’s like to deal with tricky leaks, worn-out parts, and all the little problems that pop up in a house. From plumbing repairs to kitchen fixes and garden hose setups, he’s done it all. Dylan shares real-world solutions to help others keep their homes running smoothly and avoid costly mistakes.