To install a kitchen faucet, first shut off the water under the sink and make sure the area is clear. Open the faucet to drain any leftover water. Then disconnect the water lines and remove the old faucet by loosening the nuts underneath. Clean around the holes, place the new faucet in position, tighten it from below, hook up the water lines again, and turn everything back on. Run the water for a minute to flush out any debris.
If your current faucet is leaking, loose, or just outdated, replacing it yourself might be easier than you think. You don’t need fancy tools or plumbing skills, just a little patience and a free afternoon.
This article walks you through each step in plain language. You’ll know what tools to use, how to safely take the old faucet out, and how to get the new one working without any drama. We’ll also go over how long it takes, what mistakes to avoid, and when it’s better to call in some backup.
Tools And Materials You’ll Need
Before you crawl under the sink and get your hands wet, make sure you’ve got the right tools. You don’t need a fancy toolbox, just a few basics that most DIY folks already have lying around.
What You’ll Need To Do The Job Right
- Adjustable Wrench: For loosening and tightening water line connections
- Basin Wrench: This one makes reaching up behind the sink a whole lot easier
- Plumber’s Tape: Helps seal threaded connections so they don’t leak
- Screwdriver: Often needed for mounting hardware
- Bucket and Rags: Catch water and keep things clean
- Flashlight or Headlamp: Under-sink lighting is usually not your friend
- Plumber’s Putty or Silicone Caulk: For sealing the base of the new faucet
- Putty Knife: Helps scrape off old gunk or sealant
Check These Things Before You Buy a Faucet
- How many holes does your sink have, one, three, or four?
- Will your new faucet fit those holes, or will you need a deck plate?
- Do you want a sprayer? Pull-out or side-mounted?
- Are the supply lines included, and do they match your shutoff valves?
Tool And Cost Breakdown Table
| Item | Purpose | Approx. Cost (USD) |
| Adjustable Wrench | Loosen and tighten water connections | $10 to $20 |
| Basin Wrench | Reach tight spaces behind the sink | $10 to $25 |
| Plumber’s Tape | Seal threaded pipe joints | $2 to $5 |
| Plumber’s Putty/Caulk | Seal around the faucet base | $3 to $8 |
| Bucket and Rags | Catch drips and clean up messes | Already at home |
| Flashlight | Light up the work area | $5 to $15 |
It’s a good idea to gather everything before you start. That way, you’re not crawling in and out from under the sink every five minutes.
Step-By-Step Guide To Install A Kitchen Faucet
To install a kitchen faucet step by step:
- Turn off the water valves and release pressure
- Clear out everything under the sink
- Snap a picture of the setup, just in case
- Disconnect the old faucet (or prep for a fresh install)
- Clean the sink area really well
- Insert the new faucet and tighten it in place
- Hook up the water lines again
- Turn on the water, check for leaks, and flush it out
Now, let’s walk through it together like a real-life project, not just a checklist. Whether you’re replacing an old leaky faucet or installing one from scratch, we’ll make sure nothing catches you off guard. Grab a wrench, take a deep breath, and let’s get into it.
Step 1: Turn Off The Water Supply And Prep The Area
First things first, reach under the sink and turn off those little shutoff valves. One’s for hot, one’s for cold. Turn them both clockwise until they stop. Then open the faucet above to let out any trapped water. You might hear a little hissing or get a dribble. That’s normal.
Now, here’s a trick most people miss: take a photo of everything before you touch a single nut or hose. Trust me, when you’re down there later trying to remember what went where, that one photo could save you a ton of time and confusion.
Clear out the cabinet space. You’ll want full access. Toss down an old towel and slide a small bucket underneath the pipes. If you have a garbage disposal, unplug it or flip the breaker, safety first. And get yourself a flashlight or headlamp. It’s dark in there, and your phone light isn’t going to cut it for long.
Step 2: Remove The Old Faucet (If You’re Replacing One)
Replacing an old faucet? Here comes the fun part, especially if it’s been sitting there for years. The fittings might be tight, rusted, or just plain stubborn.
Start by disconnecting the supply lines. Use your wrench and go slow. Keep that bucket close because water will likely drip out. You can use a rag to hold onto the valve so you don’t twist the pipe behind the wall.
Then, grab a basin wrench. You’re going to reach up behind the sink to loosen the mounting nuts that hold the faucet in place. This part can be frustrating. The space is tight, your arms might cramp up, and it’s okay to swear a little.
Once the nuts are off, try pulling the faucet out from above. If it’s stuck, it might be sealed with old plumber’s putty. Use a putty knife and gently wiggle it loose. If you’re installing from scratch and there’s no faucet to remove, skip ahead, but keep reading for cleaning tips.
Step 3: Clean The Sink Surface
Once the old faucet is out (or if you’re working with a brand-new sink), you’ll want a smooth surface. Use a damp cloth or sponge to wipe off any gunk, old putty, or rust marks.
For tough spots, scrape gently with a putty knife. Don’t rush this step. If you leave grime behind, your new faucet might not sit flat or seal properly, which can lead to leaks later. If you’re dealing with hard water buildup during cleaning, check out these kitchen faucets for hard water that are designed to handle it better.
Step 4: Assemble And Mount The New Faucet
Now, grab your new faucet and read through the manufacturer’s instructions. Some come pre-assembled. Others might need a few quick connections before you put it in the sink. Don’t guess, check the diagram.
If your sink has extra holes that the new faucet doesn’t need, cover them with the deck plate (escutcheon) that came with it. Put the rubber gasket or a thin ring of plumber’s putty around the base to keep water from sneaking underneath.
Drop the faucet’s supply lines down through the holes. Make sure it’s straight and centered, especially if your countertop makes the sink a focal point.
Now slide under the sink, reach up, and screw on the mounting nuts. Tighten them by hand first, then finish with the basin wrench. Tighten slowly and evenly. Don’t force it. If the faucet shifts while you’re tightening, have someone hold it in place above.
Step 5: Connect The Water Supply Lines
Time to connect the hot and cold water lines. Wrap the threads of the shutoff valves with plumber’s tape. This helps keep the connection snug and leak-free.
Attach the flexible supply lines to the matching valves, hot on the left, cold on the right. Use your adjustable wrench to tighten them just enough to feel firm. Don’t over-tighten. You want secure, not crushed.
If your faucet didn’t come with pre-attached supply lines, you’ll need to get some that fit both your faucet and shutoff valves. Bring your old ones to the hardware store if you’re unsure what to buy.
Step 6: Flush The Lines And Check For Leaks
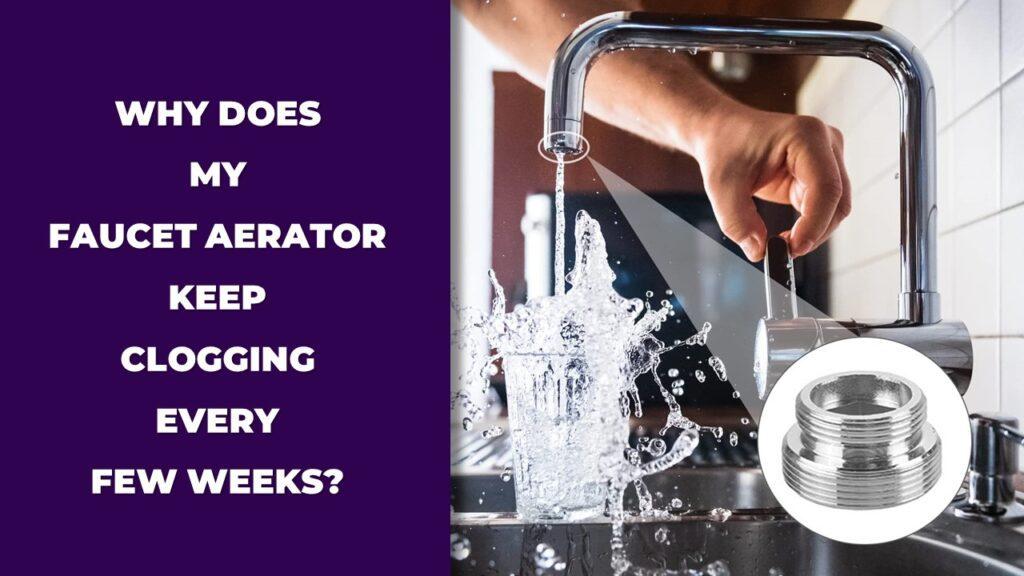
Before you run the faucet, take the aerator off the spout. That little screen can trap dirt, and you want to flush out anything loose in the lines first.
Now, slowly turn the shutoff valves back on. Listen. You’ll hear the water moving through the lines. Check underneath the sink as it runs. Use your flashlight. Look at every connection. If it’s leaking, give it a gentle tightening.
Let the water run for about a minute. Then turn it off, wipe everything dry, and see if any moisture creeps back in. If not, screw the aerator back on, and congrats, you did it.
You just installed a kitchen faucet. That’s no small thing.
Common Mistakes To Avoid When Installing A Faucet
Common mistakes when installing a kitchen faucet include forgetting to turn off the water, skipping sealing materials like plumber’s tape, over-tightening connections, and misaligning the faucet. These small errors can lead to leaks, damage, or starting over from scratch.
Installing a faucet might seem pretty straightforward, but a few slip-ups can really throw a wrench into things. Here are the common pitfalls to watch out for, especially if it’s your first time doing this kind of work.
- Not Shutting Off the Water Properly: It sounds basic, but it happens. Some people forget to fully close the shutoff valves or forget to open the faucet to release pressure. Result? A surprise spray in the face or a flooded cabinet.
- Skipping the Photo Before You Start: Before you disconnect anything, snap a clear photo of the setup. It takes ten seconds and might save you an hour of guesswork later.
- Buying the Wrong Faucet for Your Sink Holes: Not all faucets fit every sink. Count the holes and measure the spacing before you buy. A single-hole faucet won’t work without a deck plate on a three-hole sink.
- Skipping Plumber’s Tape or Putty: Teflon tape on threaded parts and plumber’s putty (or a gasket) under the base are what keep things watertight. Forget these, and you’ll likely be dealing with leaks.
- Over-Tightening Fittings: It’s tempting to wrench everything super tight, but too much pressure can strip threads or crack connectors. Tighten just until snug, then give it a bit more if needed.
Troubleshooting Installation Issues
If your kitchen faucet isn’t working properly after installation, the most common issues are leaks, low water pressure, and loose fittings. These can usually be fixed by tightening connections, cleaning out debris, or double-checking alignments.
Sometimes, even after you follow all the steps, something still doesn’t feel right. Maybe there’s a slow drip or the water pressure seems off. Here are some common issues and how to fix them without tearing your hair out.
- Leaks Under the Sink: First, dry everything off with a towel. Then turn the water on and watch closely. If you see drips, they usually come from a loose connection or missed plumber’s tape. Tighten gently and check again.
- Faucet Wiggles or Moves: If the faucet feels loose when you move it, the mounting nuts underneath probably need another turn or two. You might need someone to hold it from above while you tighten from below.
- Low Water Pressure or Uneven Flow: Remove the aerator and clean out any debris that might be trapped inside. New faucets sometimes have little bits of plastic or grit from manufacturing that clog things up.
- Sprayer Hose Won’t Retract Properly: If your pull-down faucet won’t slide back easily, check the weight on the hose underneath. It may be hitting something or be installed too high. Lower it a few inches or move it to a clearer spot.
- Water Temperature Feels Backward: If hot water comes out when you turn the cold handle, just swap the supply lines. If your faucet keeps acting up, you might be dealing with deeper issues like a metering cycle faucet problem. It’s a quick fix and super common when you’re not sure which valve is which.
- Dripping from the Spout After Install: This could be trapped air. Let the faucet run for a full minute or two, then turn it off and wait. If it still drips, check the aerator or cartridge for debris or a bad seal.
- Reusing Old or Worn-Out Supply Lines: If you’re replacing a faucet, go ahead and replace the old supply lines too. They wear out and can be the hidden cause of leaks down the road.
- Installing the Faucet Off-Center: Once it’s tightened, it’s harder to adjust. Check that it’s sitting straight from the top before you lock it in underneath.
Time And Cost Breakdown
Installing a kitchen faucet usually takes 1 to 4 hours, depending on your experience and whether you’re starting from scratch or replacing an old one. Costs range from $50 for a basic DIY job to over $800 if you hire a plumber, especially if plumbing work is needed.
So, you’re halfway through the job or still deciding whether to tackle it yourself. Time and money are on your mind, and I don’t blame you. Let’s walk through what to realistically expect with both, whether you’re installing a new kitchen faucet for the first time or replacing a leaky one.
How Long Does It Take To Install A Kitchen Faucet?
If this is your first time and you’ve never worked under a sink before, give yourself 3 to 4 hours, especially if you’re removing an old faucet first. Things like tight corners, rusted nuts, or confusing parts can eat up more time than you think.
If you’re installing a faucet on a brand-new sink (with no old hardware to fight), that might cut your time in half. You could be done in 1 to 2 hours, even as a beginner.
And yes, a professional plumber can often do it in under an hour, but that’s after installing hundreds of them. Don’t compare your first try to that. You’re not slow—you’re learning.
Cost To Install A Kitchen Faucet: DIY vs Hiring A Plumber
If you already have a wrench and plumber’s tape, your total cost might just be the price of the faucet. Basic kitchen faucets start around $50 to $100, while pull-down sprayer faucets and touch-activated faucets can run $150 to $400 or more.
Add around $20 to $50 for tools and supplies if you’re missing basics like a basin wrench or putty.
Now, if you hire a plumber, you’re looking at $200 to $500 just for labor, depending on your location. If there’s any complexity, like cutting into a countertop, fixing corroded pipes, or dealing with leaking shutoff valves, that bill can jump to $600 or $800+ before you know it.
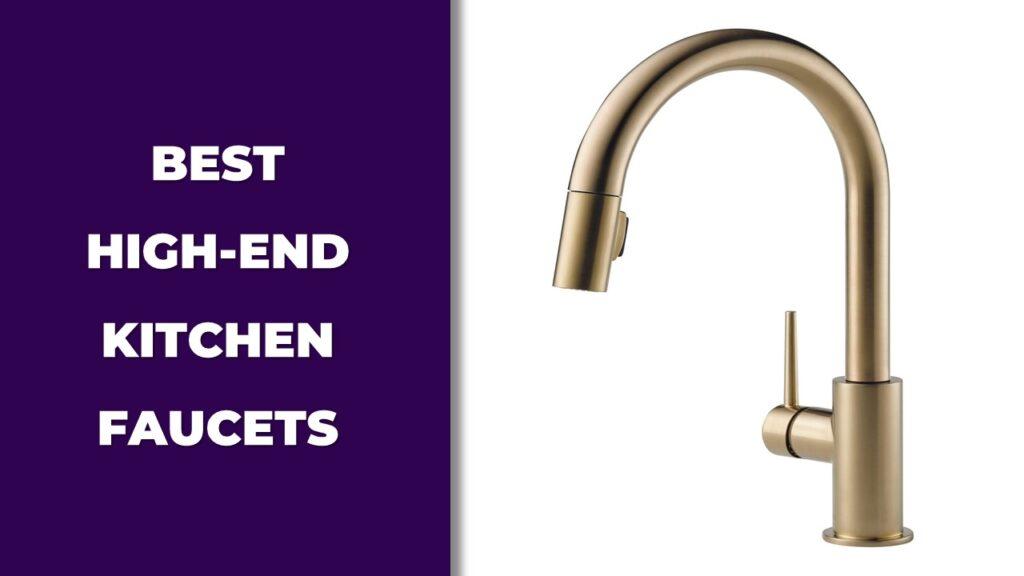
If you’re considering a premium upgrade instead of a basic model, take a look at some high-end kitchen faucets that are built to last and are easier to install than you’d think.
Bottom line? If your sink and shutoff valves are in good shape, DIY is the cheaper route and very doable with some patience.
When To Call A Professional
Call a licensed plumber if your faucet installation involves rusted shutoff valves, broken supply lines, or if you’re changing sink configurations and don’t know how to reroute plumbing. Also, call a pro if you’ve tried and it’s just not working. That’s okay.
Let’s be honest. Sometimes you climb under the sink with good intentions, only to meet a rusted nut that won’t budge or pipes that look like they’ve been there since the ‘80s. You sit there, flashlight in your teeth, YouTube open, and still no idea how to move forward.
That’s when calling a professional isn’t a defeat, it’s smart.
If your shutoff valves are leaking or won’t turn, don’t force them. You can snap them, and then you’re in deeper water (literally). If your pipes look corroded, if you’re replacing a faucet and find water damage, or you’re trying to install a faucet with a sprayer in a sink that has no extra holes, don’t risk it. A plumber can do in minutes what might take you hours—or a full weekend of frustration.
Also, if you’ve already tried and things still leak or wiggle, stop. You gave it a good go. Sometimes hiring help means you’re buying peace of mind, not just labor.
Maintenance Tips After Installation
To keep your kitchen faucet working properly, clean the aerator every few months, check for slow leaks under the sink, and avoid harsh chemicals when cleaning. Small habits like these can help your faucet last for years without trouble.
So you did it. The faucet’s installed, water’s flowing, and you didn’t flood the kitchen. That’s a win. But if you want this thing to last without strange drips or loose handles a few months down the road, here are a few practical maintenance tips.
- Clean the Aerator Every 2–3 Months: This tiny screen traps sediment and can mess with your water flow. Unscrew it from the spout, rinse it under water, and pop it back on. If the stream ever starts sputtering, check this first.
- Check for Leaks After a Few Days: The day you finish, it might look dry. But pressure can shift parts over time. Slide your hand under the sink once a week for the first month and feel around the fittings. Even a tiny drip matters.
- Wipe Down the Faucet Weekly: A soft cloth and a bit of soapy water is all you need. No harsh sprays. They can eat through the finish or dry out the rubber seals inside the handle.
- Tighten Loose Handles or Sprayers Early: If something starts to feel wobbly, fix it right away. Waiting can turn a five-minute job into a full reinstall later.
- Know When It’s the Washer or Cartridge: If it starts dripping even when the handle’s off, the problem isn’t your install; it’s likely a worn washer or cartridge inside. You can also check if it’s leaking from the handle, which might point to this common faucet handle leak issue. These parts are cheap and simple to replace.
Faucets aren’t high-maintenance, but a little care here and there saves you from a headache later.
Conclusion
To install a kitchen faucet, shut off the water, remove the old fixture (if there is one), clean the sink area, mount the new faucet, reconnect the supply lines, and test everything for leaks. Whether you’re replacing a kitchen faucet or installing one for the first time, the process is easier when you follow a clear step-by-step guide.
If you’ve made it this far, you’re likely knee-deep in tools, maybe a little sore from crouching under the sink, and wondering if you did it right. That’s completely normal. Installing a kitchen faucet on your own isn’t just about saving money—it’s about figuring things out with your own two hands. You just walked through one of the most practical home fixes there is, and hopefully, you’re feeling proud about it.
We broke down every part of this DIY kitchen faucet installation tutorial with real-life moments in mind—from taking a photo before touching anything, to handling a stuck nut that won’t budge. Because it’s not just about learning how to replace a kitchen faucet. It’s about knowing that even when you’re unsure, you’ve got the right help, the right steps, and a little push to finish strong. And if it leaks a little the first time? Tighten it, wipe it down, and try again. You’ve got this.
Related FAQs
Can I Install A Kitchen Faucet Without A Plumber?
Yes, most people can install a kitchen faucet without hiring a plumber. With basic tools, clear instructions, and a bit of patience, it’s a manageable DIY project. Just make sure to turn off the water and follow each step carefully.
Do All Kitchen Faucets Fit All Sinks?
No, kitchen faucets are not one-size-fits-all. The number of holes in your sink and the spacing between them must match the faucet. You can use a deck plate to cover unused holes if needed.
How Long Does It Take To Replace A Kitchen Faucet?
Replacing a kitchen faucet usually takes 1 to 4 hours. It depends on your experience, whether you’re removing an old faucet, and if any parts are rusted or hard to reach. Pros can do it faster, but DIY is still very doable.
Why Is My Faucet Leaking After Installation?
If your new faucet is leaking, it’s often due to loose fittings or missing plumber’s tape. Check all connections under the sink and make sure the faucet is sealed properly at the base. Running water too soon without flushing may also cause drips.
What Tools Do I Need To Install A Kitchen Faucet?
You’ll need an adjustable wrench, basin wrench, plumber’s tape, screwdriver, and possibly plumber’s putty. A bucket, flashlight, and some rags will also come in handy during the process.
Should I Replace The Supply Lines When Installing A New Faucet?
Yes, it’s a good idea to replace the supply lines during faucet installation. Old or worn lines can leak later and are inexpensive to update while you’re already under the sink.

Dylan Foster is a family man with years of hands-on experience in plumbing, household maintenance, and fixing everyday issues around the home. A former plumber, Dylan knows what it’s like to deal with tricky leaks, worn-out parts, and all the little problems that pop up in a house. From plumbing repairs to kitchen fixes and garden hose setups, he’s done it all. Dylan shares real-world solutions to help others keep their homes running smoothly and avoid costly mistakes.